Affiliate Disclosure
HVAC Guide Guys is a participant in the Amazon Services LLC Associates Program, an affiliate advertising program designed to provide a means for sites to earn advertising fees by advertising and linking to Amazon.
Ever wondered why your AC isn’t cooling like it should? The answer might be in superheat measurements for your HVAC system.

Learning to measure superheat in your HVAC system is key. It can save you thousands in repairs. Accurate readings tell you about your system’s refrigerant and how well it’s working.
Professional HVAC techs know how important it is to get superheat measurements right. This guide will show you six simple steps to measure superheat accurately.
Whether you’re a homeowner or a pro, knowing how to get accurate superheat readings is vital. It helps you spot problems early, before they cost a lot.
Key Takeaways
- Superheat measurement is essential for HVAC system performance
- Accurate readings prevent possible compressor damage
- Understanding superheat helps optimize cooling efficiency
- Six systematic steps make superheat measurement manageable
- Proper measurement applies to both residential and commercial HVAC systems
Table of Contents
Understanding Superheat in HVAC Systems
Knowing about hvac refrigerant superheat is key for a good air conditioning system. Your system needs exact temperature and pressure to work best.
Superheat is the extra heat the refrigerant vapor takes on after it turns fully into gas. It’s vital for your air conditioning to run well and efficiently.
What is Superheat and Why It Matters
Superheat is the temperature difference between the refrigerant vapor and its saturation temperature. It’s important to keep your HVAC system’s compressor safe.
- Prevents liquid refrigerant from entering the compressor
- Indicates proper system charge and performance
- Ensures optimal heat transfer efficiency
The Role of Saturation Temperature in Superheat Measurement
Saturation temperature is the main point for checking refrigerant vapor temperature. At this exact temperature, refrigerant changes from liquid to gas.
| Refrigerant Type | Saturation Temperature | Typical Superheat Range |
|---|---|---|
| R-410A | 40°F | 8-12°F |
| R-22 | 45°F | 10-15°F |
Superheat vs Subcooling: Key Differences
Superheat and subcooling might seem alike, but they measure different things. Subcooling and superheat are important tools for checking HVAC systems.
“Understanding superheat is like knowing the heartbeat of your air conditioning system.” – HVAC Professional
The big difference is where these measurements happen. Superheat is in the evaporator (low-pressure side), and subcooling is in the condenser (high-pressure side).
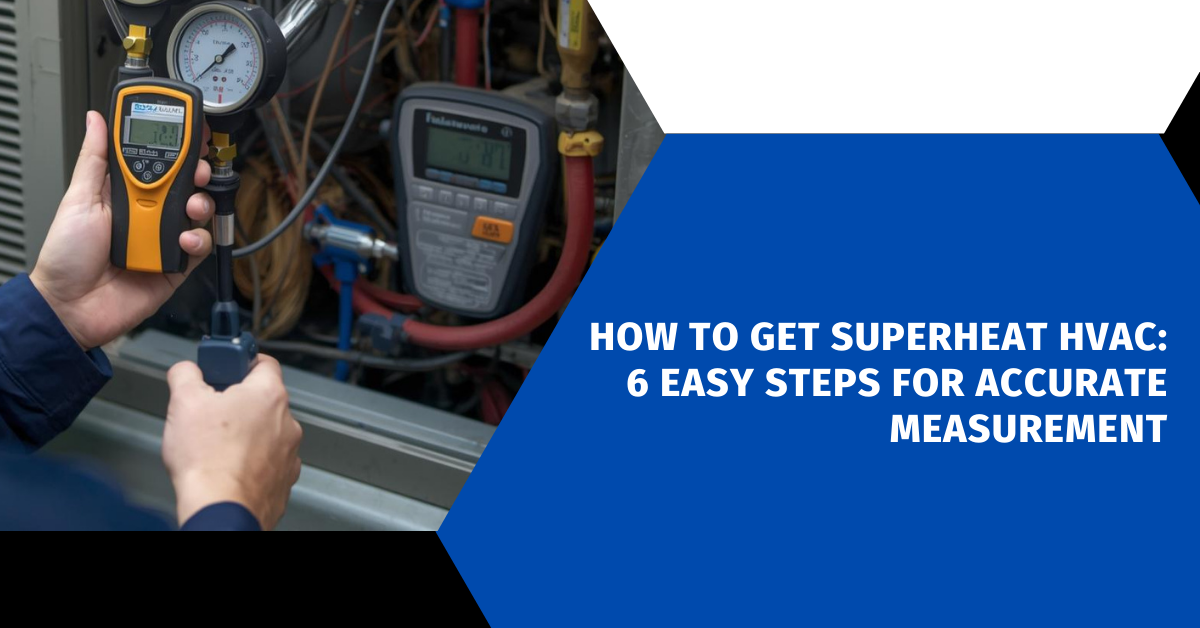
Essential Tools for Measuring HVAC Superheat
Getting accurate superheat readings needs the right tools. You must pick the best equipment for precise temperature and pressure checks.
- Manifold gauges (digital or mechanical)
- Digital thermometer with thermocouple attachment
- Pressure temperature chart
- Psychrometer
- Clamp-type temperature probes
Digital manifold gauges are top-notch for HVAC pros. They can automatically figure out superheat, saving you from hard math. They also have built-in charts for quick readings.
“Precision is key in HVAC diagnostics – your tools determine your accuracy.”
Choose temperature tools with an accuracy of ±1°F. Clamp-type probes give better contact than K-type thermocouples. This means more reliable pipe temperature readings.
Make sure your toolkit has a good psychrometer. It measures wet and dry bulb temperatures. This helps you check superheat against the manufacturer’s specs, making your checks more detailed.
Explore Our HVAC Shop
Looking for top-rated HVAC tools, parts, and accessories? Visit our shop and find the perfect solution for your needs.
Visit the ShopPreparing Your HVAC System for Superheat Testing
Getting your HVAC system ready for superheat testing is key. Before you start, make sure everything is set up right. This ensures you get accurate results.
- Ensure the HVAC system is in full operational mode
- Create stable system conditions for accurate readings
- Verify all components are functioning correctly
Running the System to Achieve Steady-State Temperatures
It’s important to get your system to steady-state operation. Start by running it for 10-15 minutes. This helps stabilize temperatures and pressures.
Set your thermostat 10 degrees lower than the current room temperature. This keeps the compressor working well.
| System Condition | Recommended Setting |
|---|---|
| Run Time | 10-15 minutes |
| Thermostat Setting | 10 degrees below indoor temp |
| Evaporator Coil Status | Fully operational |
Locating the Suction Service Valve
Finding the suction line service valve is a big step. Look for it on the bigger copper line between the evaporator coil and compressor. This valve lets you connect manifold gauges for precise measurements.
Pro tip: Use quick-connect low-loss fittings to avoid losing refrigerant. Always be safe and have your tools ready before you start.
How to Get Superheat HVAC
Measuring refrigerant superheat is key for HVAC techs and DIY fans. It needs precision and the right tools. This guide makes it easy to follow each step.
- Manifold gauge set
- Temperature measuring device
- Pressure-temperature chart
- Thermometer or temperature probe
Here’s a detailed guide on how to measure superheat:
- Connect Manifold Gauges: Attach the blue low-pressure hose to the suction line service valve
- Activate the System: Set thermostat to cooling mode, targeting 10 degrees below indoor temperature
- System Stabilization: Run the system for 10-15 minutes to reach steady-state conditions
- Pressure Reading: Record the suction line pressure from the low-pressure gauge
- Temperature Measurement: Take suction line temperature 6 inches from the service valve
The last step is to subtract the saturation temperature from the actual suction line temperature. Digital manifold gauges make this easier by doing the math for you.
| Step | Action | Purpose |
|---|---|---|
| 1 | Gauge Connection | Establish pressure reading point |
| 2 | System Activation | Create consistent operating conditions |
| 3 | System Stabilization | Ensure accurate measurements |
| 4-5 | Pressure & Temperature Reading | Collect critical superheat data |
Getting good at this takes time. Always check your work and look up your HVAC system’s specs.
Measuring Suction Line Temperature Accurately
Getting the suction line temperature right is key in HVAC systems. Your reading can change everything in your diagnostic work. So, being precise is very important.
For accurate pipe temperature readings, use a few important techniques. The right spot for your thermocouple can really help get the temperature right.
Proper Thermocouple Placement Techniques
Finding the best spot for thermal contact is essential. Here are some tips for accurate suction line temperature measurement:
- Choose a clean section of copper tubing
- Position the probe about 6 inches from the suction service valve
- Make sure it’s in direct contact with the pipe
- Stay away from areas with oil, dirt, or corrosion
Avoiding Common Temperature Reading Errors
Many HVAC techs make mistakes when measuring pipe temperature. Pocket thermometers and infrared guns can give wrong readings because of bad thermal contact or outside interference.
For accurate measurements, use these professional methods:
- Use specialized pipe clamp thermocouples
- Wrap bare thermocouple wire around the pipe
- Keep the probe away from air
- Wait until the temperature is stable before taking a reading
Getting the suction line temperature right needs focus and the right tools. Don’t take shortcuts that can mess up your accuracy.
Explore Our HVAC Shop
Looking for top-rated HVAC tools, parts, and accessories? Visit our shop and find the perfect solution for your needs.
Visit the ShopRecording and Converting Pressure Readings
Getting accurate ac superheat starts with precise pressure readings. Your refrigerant pressure gauge is key for finding the important pressure-temperature link in HVAC systems. Knowing how to turn pressure readings into saturation temperature is key for top system performance.

- First, know the specific refrigerant in your HVAC system
- Then, find the low-side (suction) pressure gauge
- Wait for the pressure reading to settle
- Choose the right pressure-temperature chart
Different refrigerants have unique pressure-temperature links. For example, R-22 and R-410A work at very different pressures, even at similar temperatures.
| Refrigerant Type | Pressure Range (psi) | Saturation Temperature Range |
|---|---|---|
| R-22 | 50-90 | 40-55°F |
| R-410A | 100-150 | 50-70°F |
Pro tip: Use a straightedge or ruler to line up pressure readings with the right saturation temperature on your chart. This way, you get accurate readings for your ac superheat calculation.
Precision in pressure reading is the foundation of effective HVAC system diagnostics.
Calculating Superheat Using the Superheat Formula
Knowing how to calculate ac superheat is key for keeping your HVAC system running well. The superheat formula lets technicians check how the refrigerant works and how efficient the system is.
To calculate superheat, you need to measure temperature and pressure. The basic formula is simple: subtract the evaporator’s saturation temperature from the actual suction line temperature.
Using Pressure-Temperature Charts
Pressure temperature charts are vital for finding saturation temperatures. They help turn pressure readings into exact temperature values for precise superheat calculations.
- Locate the correct refrigerant column
- Find your measured system pressure
- Read across to determine saturation temperature
- Interpolate between values if necessary
For instance, if your suction line temperature is 59°F and the chart shows a saturation temperature of 45°F, your superheat is 14°F (59°F – 45°F).
Digital Manifold Gauges for Automatic Calculations
Digital gauge technology has changed how we measure superheat. Modern digital manifold gauges can automatically do ac superheat calculations by:
- Storing pressure-temperature data for multiple refrigerants
- Connecting temperature probes directly
- Displaying real-time superheat readings
- Reducing manual calculation errors
Pro tip: While digital gauges make calculations easier, it’s important for HVAC technicians to understand the basics.
Determining Target Superheat for Your System
Knowing the target superheat is key for a good air conditioner system. Each HVAC unit has its own ideal superheat range for best performance.
- Check manufacturer specifications for precise target superheat
- Locate the charging chart inside the condenser electrical panel
- Measure wet bulb and dry bulb temperatures accurately
- Compare measured superheat against manufacturer recommendations
Measuring wet bulb dry bulb temperature needs special tools. A psychrometer is used for these important measurements. Most systems with TXV (thermal expansion valve) keep a superheat between 10-15°F, with a ±5°F margin.
| System Type | Target Superheat Range | Measurement Method |
|---|---|---|
| Fixed Orifice Systems | 10-20°F | Charging Chart |
| TXV Systems | 10-15°F | Subcooling Measurement |
Professional technicians suggest checking your specific manufacturer specs. This will give you the most accurate target superheat for your HVAC system.
Explore Our HVAC Shop
Looking for top-rated HVAC tools, parts, and accessories? Visit our shop and find the perfect solution for your needs.
Visit the ShopCommon Superheat Measurement Mistakes to Avoid
HVAC technicians often face errors that affect system performance. It’s key to know these common mistakes to keep refrigeration systems working right and avoid expensive errors.

The Beer Can Syndrome: Dangerous HVAC Shortcuts
The beer can syndrome is a big problem in HVAC. It’s when technicians guess system performance by feeling the suction line temperature with their hands. This is a risky shortcut.
These guesses can cause big issues:
- Systems can be overcharged or undercharged
- Energy use goes down
- Compressors might get damaged
- Running costs go up
Calibration and Accuracy Challenges
Calibration problems are common in HVAC. Mistakes often come from:
- Using tools that aren’t calibrated
- Measuring pressure in the wrong spots
- Not waiting for the system to reach steady-state
- Not checking instruments regularly
Professional technicians need to focus on exact measurements. They should avoid quick guesses and use well-maintained tools for accurate superheat readings.
Troubleshooting HVAC Issues Using Superheat Readings
Understanding superheat readings is key for fixing HVAC problems. These numbers tell us how well our systems are working. They help spot refrigerant issues early, before they get worse.
- Low Refrigerant Charge: High superheat with low suction pressure means not enough refrigerant
- Overcharged System: Low superheat with high suction pressure means too much refrigerant
- Airflow Restrictions: Weird superheat readings can point to coil or filter issues
When checking your system, watch for these superheat signs:
| Superheat Reading | Potential Issue | Recommended Action |
|---|---|---|
| High Superheat | Low Refrigerant | Check and recharge system |
| Low Superheat | Overcharged System | Recover excess refrigerant |
| Inconsistent Readings | Metering Device Problem | Inspect TXV or expansion device |
Figuring out why superheat is high or low needs careful thought. A methodical approach helps avoid wrong guesses and costly fixes. Always look at superheat numbers with a visual check and detailed pressure tests.
Professional technicians know that superheat is not a standalone diagnostic tool, but a critical piece of a larger system assessment.
Adjusting Refrigerant Charge Based on Superheat
Getting the right amount of refrigerant is key for your HVAC system’s health. Knowing when and how to adjust it can save you money and avoid damage.
Adjusting refrigerant needs careful attention to superheat levels and system details. Each system has its own way of handling superheat charging and refrigerant recovery.
When to Add or Remove Refrigerant
Figuring out when to add or remove refrigerant involves several important signs:
- Check superheat readings for system performance
- Observe suction line pressure
- Assess system temperature and airflow
- Use digital manifold gauges for precise measurements
Fixed Orifice vs TXV Systems
Different HVAC systems need different ways to adjust superheat:
| System Type | Charging Method | Superheat Approach |
|---|---|---|
| Fixed Orifice | Direct superheat adjustment | Add/remove refrigerant to modify superheat |
| TXV (Thermostatic Expansion Valve) | Subcooling method | Focus on high-side pressure and subcooling |
When adding refrigerant, follow these steps for fixed orifice charging:
- Connect refrigerant cylinder to low-side service port
- Open cylinder valve slowly
- Add refrigerant in small 2-4 ounce increments
- Allow system to stabilize between additions
- Monitor superheat and suction pressure continuously
Safety Note: Always use EPA-certified recovery equipment and never vent refrigerant into the atmosphere.
Conclusion
Mastering superheat measurement is key to keeping your HVAC system running well. Knowing how to read and understand superheat levels can greatly improve your system’s performance and lifespan. This guide has shown you how to do this effectively.
Getting the refrigerant charge right is essential for good HVAC maintenance. You’ve learned how to balance temperatures and pressures in your system. Remember, being precise is important. Small mistakes can hurt your system’s performance and raise energy costs.
Professional HVAC techs know the value of learning these skills. At first, it might seem hard, but with practice and the right tools, it becomes easier. If you’re unsure, it’s best to get help from a certified HVAC expert to keep your system running smoothly.
Your effort to learn about superheat measurement is a big step forward. By keeping up with these skills, you’ll take care of your HVAC system and keep your space comfortable and energy-efficient for a long time.