Affiliate Disclosure
HVAC Guide Guys is a participant in the Amazon Services LLC Associates Program, an affiliate advertising program designed to provide a means for sites to earn advertising fees by advertising and linking to Amazon.
How to Add a Return to Existing HVAC? Are you dealing with uneven temperatures and poor air circulation at home? Adding a single return vent could greatly improve your HVAC system’s performance.

Many homeowners don’t realize how important return air systems are for comfort. An HVAC retrofit can fix many ventilation issues. It does this by adding return air vents to your existing ductwork.
This guide will show you how to add a return to your HVAC system. You’ll learn how to improve airflow and make your home more comfortable. You’ll also learn about the tools and materials you need.
Key Takeaways
- Learn the importance of proper return air circulation
- Understand essential tools and materials needed
- Discover step-by-step installation techniques
- Recognize signs of inadequate return air systems
- Know when to DIY versus hire a professional
Table of Contents
Understanding HVAC Return Systems and Their Importance
Your home’s comfort depends on a well-designed HVAC system. Return air systems play a key role in keeping air quality and energy use high. Installing HVAC return ducts is more than a technical task—it’s about making your home comfortable.
Return air systems are like the lungs of your heating and cooling system. They help air move around your home, ensuring it works well. Keeping air flowing well is essential for a healthy and comfy indoor space.
Basic Components of Return Air Systems
A typical return air system has several important parts:
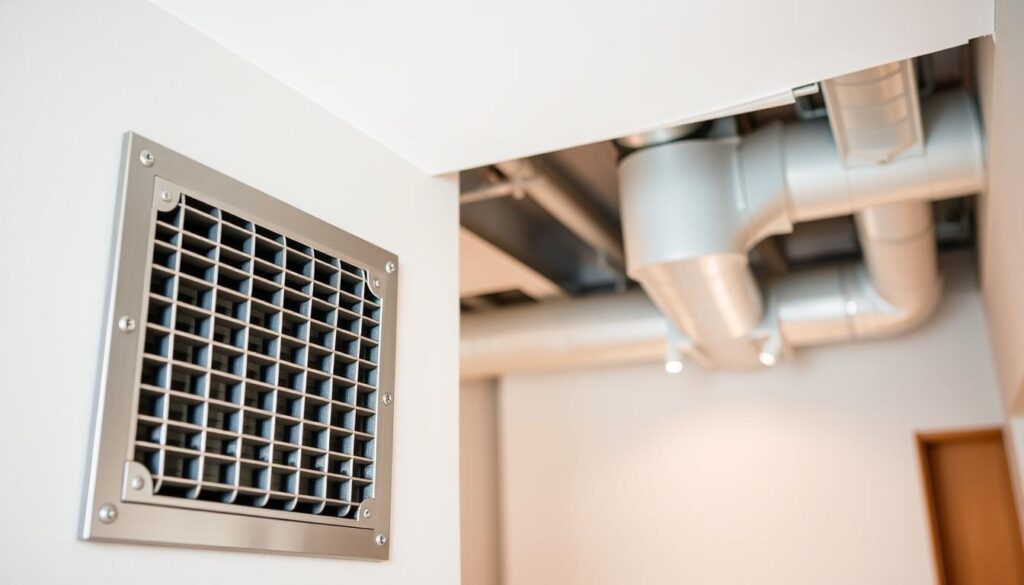
- Return air vents
- Ductwork
- Air filters
- Grilles and registers
How Return Air Affects HVAC Performance
The return air system greatly affects your HVAC’s performance by:
- Keeping air pressure right
- Filtering indoor air
- Helping temperatures stay even
- Lowering energy use
| Component | Function | Impact on HVAC |
|---|---|---|
| Return Vents | Collect air from living spaces | Enables air circulation |
| Ductwork | Transport air back to HVAC system | Ensures efficient air movement |
| Air Filters | Remove dust and contaminants | Improves air quality |
Signs You Need Additional Returns
Look out for these signs that you might need more return air system components:
- Uneven room temperatures
- High energy bills
- Poor air quality
- Inconsistent airflow
Knowing about your home’s return air system helps you make smart choices about HVAC care and upgrades.
Explore Our HVAC Shop
Looking for top-rated HVAC tools, parts, and accessories? Visit our shop and find the perfect solution for your needs.
Visit the ShopEssential Tools and Materials for Adding a Return
Starting an HVAC remodeling project needs the right tools and materials. You must have the correct equipment before you begin. This is key for a successful return air installation.
Here are the essential tools for your HVAC renovation:
- Measuring tape for precise measurements
- Utility knife for cutting materials
- Power drill with various drill bits
- Straight edge for accurate cutting
- Marker for marking cut lines
- Flashlight for working in tight spaces
- Ladder for accessing high areas
- Tin snips for cutting metal ductwork
- Sheet rock saw for creating openings
When picking materials, choose quality and durability. Your home’s air system needs strong materials. Use rigid ductwork, flexible connectors, and good sealing materials for a lasting installation.
Pro tip: Invest in high-quality tools and materials to prevent future repairs and optimize your HVAC system’s performance.
Always put safety first in HVAC renovation. Wear safety glasses, work gloves, and a dust mask. Make sure you have all the tools before starting. This helps avoid delays and makes the installation smooth.
Planning Your Return Air Installation
Starting a HVAC system project needs careful planning. Your return air path needs smart thinking and detailed prep for best results. Good planning helps avoid mistakes and makes the installation smooth.
- Evaluate existing ductwork layout
- Identify potential installation challenges
- Gather necessary tools and materials
- Assess room configurations
Choosing the Optimal Location
Finding the best spot for your return air vent is key. Look for areas with:
- Good air circulation
- Minimal obstructions
- Proximity to existing ductwork
- Adequate wall or ceiling space
“The right location can make or break your HVAC system’s efficiency” – HVAC Professional
Measuring and Calculating Duct Size
Getting measurements right is crucial. Measure the return air path well to find the right duct size. Wrong sizes can hurt system performance.
Safety Considerations and Preparations
Always put safety first. Get ready by:
- Turning off electrical power
- Wearing protective gear
- Checking for potential structural limitations
- Ensuring proper ventilation during installation
Pro tip: When in doubt, consult a professional HVAC technician to guide your installation process.
Explore Our HVAC Shop
Looking for top-rated HVAC tools, parts, and accessories? Visit our shop and find the perfect solution for your needs.
Visit the ShopHow to Add a Return to Existing HVAC
Adding return vents to your HVAC system can greatly improve your home’s air flow and comfort. It’s a process that needs careful planning and precise steps.
First, you’ll need to gather the right tools and materials. Your toolkit should include:
- Measuring tape
- Reciprocating saw
- Drill with various bits
- Flexible ductwork
- Return air box
- Protective safety gear
Adding return vents involves strategic planning and careful steps. Start by finding the best spot for your new return air vent. Look for areas with good airflow and close to existing ductwork.
Cutting the initial opening needs precision. Measure twice, cut once is key when adding return vents. Use your measuring tape to mark the exact spot, making sure to avoid electrical wiring or structural elements.
Pro tip: Always turn off your HVAC system before beginning any installation work to ensure safety.
Connecting the new return ductwork requires attaching the return air box to the existing duct system. Use high-quality duct tape or mastic sealant to seal all connections. This prevents air leaks and keeps the system efficient.
Professional HVAC technicians suggest testing the new return vent after installation. This step checks if the airflow and sealing are correct. It ensures your efforts lead to better home comfort and energy efficiency.
Installing Return Air Ductwork in the Attic
Adding a return air duct to your HVAC system needs careful planning and precise steps. The attic is a great place for this, with lots of space and easy access to ductwork. Your hvac retrofit project will have several key steps for the best performance and energy use.
- Flexible metal ductwork
- HVAC foil tape
- Insulation wrap
- Utility knife
- Measuring tape
- Work gloves
Connecting to Main Trunk Line
To link your new return duct to the main trunk line, follow these steps:
- Find the main trunk line in your attic
- Measure the ductwork’s diameter
- Cut a precise hole with a hole saw
- Securely attach a sheet metal collar
- Connect flexible ductwork to the collar
Sealing and Insulating New Ductwork
Sealing is key to prevent air leaks and boost system efficiency. Wrap all connection points with high-quality foil tape for a tight seal. Use insulation wrap around the ductwork to keep air temperature steady and reduce heat transfer.
Testing for Proper Installation
After installing your hvac return duct, test the system thoroughly. Run your HVAC and check for:
- Consistent airflow
- No air leaks
- Proper temperature regulation
- Absence of unusual noises
Getting a professional to inspect can give you extra peace of mind. It ensures your retrofit meets all technical standards.
Explore Our HVAC Shop
Looking for top-rated HVAC tools, parts, and accessories? Visit our shop and find the perfect solution for your needs.
Visit the ShopCreating and Cutting Ceiling Openings
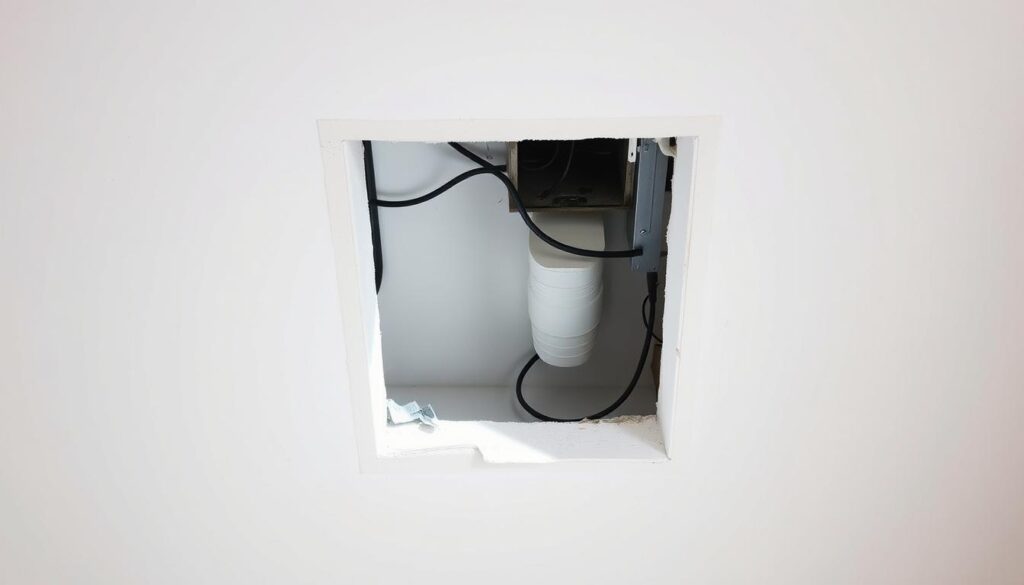
When you’re doing hvac remodeling, making precise ceiling openings is key. This step is vital for installing a new return air system. You’ll need careful planning and the right tools for a top-notch job.

- Locate ceiling joists using a stud finder
- Identify electrical wiring and plumbing lines
- Mark the exact opening dimensions
- Select appropriate cutting tools
Your hvac renovation needs to be precise. Here are the tools you should use for cutting ceiling openings:
| Tool | Best Used For | Recommended Technique |
|---|---|---|
| Utility Knife | Initial scoring | Make light, controlled cuts |
| Drywall Saw | Complete cutout | Cut slowly along marked lines |
| Reciprocating Saw | Larger openings | Use with caution near joists |
When cutting your ceiling opening, always wear safety glasses and a dust mask. Double-check your measurements before cutting. This helps avoid damage to your ceiling during hvac remodeling.
After cutting, add wooden framing to the opening’s edges. This makes a strong base for your return air grille. It ensures a professional and secure installation for your new HVAC system part.
Installing Return Air Grilles and Registers
Setting up your HVAC return system needs the right choice and installation of return air grilles and registers. These parts are key for better airflow and system performance in your home.
When adding return vents, several important factors come into play to boost your HVAC system’s efficiency.
Selecting the Right Size and Style
Picking the right return air grille is more than just about looks. The size affects how well your system moves air.
- Measure the existing duct opening precisely
- Select grilles that match or slightly exceed the duct size
- Consider room decor when picking grille style
Positioning for Maximum Performance
Where you place return air grilles greatly affects airflow in your home. Good spots include:
- Central areas with high air circulation
- Near heating or cooling sources
- Away from direct sunlight or drafts
Installation and Sealing Techniques
| Installation Method | Difficulty Level | Required Tools |
|---|---|---|
| Screw-mount | Easy | Power drill, screwdriver |
| Clip-on | Moderate | Measuring tape, level |
| Professional mounting | Advanced | Specialized HVAC tools |
Sealing the grille properly stops air leaks and keeps your system efficient. Use weatherstripping or special caulk for a tight seal between the grille and wall.
Pro tip: Always wear protective gear and follow manufacturer instructions during installation.
By choosing, placing, and installing your return air grilles wisely, you’ll make your home more comfortable and improve your HVAC system’s performance.
Balancing Airflow After Installation
After your HVAC retrofit, it’s key to balance airflow for the best performance. This ensures every room gets the right amount of air for comfort.
Begin with a detailed airflow check. Follow these steps to fine-tune your system:
- Check supply and return vents in each room
- Measure temperature differences between rooms
- Inspect damper positions in main ductwork
- Test air velocity using a digital anemometer
Poor airflow signs include:
- Inconsistent room temperatures
- High energy bills
- Reduced comfort in specific areas
- Increased dust accumulation
To get balanced airflow, tweak register openings and dampers carefully. Small changes can greatly improve system efficiency. Aim for even air flow in your home.
Still facing airflow issues? An HVAC expert can help. They’ll do detailed tests and give tailored advice for your system.
Explore Our HVAC Shop
Looking for top-rated HVAC tools, parts, and accessories? Visit our shop and find the perfect solution for your needs.
Visit the ShopCommon Mistakes to Avoid During Installation
Homeowners often run into problems when they modify their hvac systems. These issues can affect how well your return air setup works. Knowing these common mistakes can help you avoid wasting time, money, and get frustrated during the installation.

Getting your hvac return duct installed right needs focus and skill. The biggest mistakes can really hurt how well your system works and how much energy it uses.
Ductwork Sizing Errors
Getting the size of your ductwork wrong is a big problem. If your return ducts are too small or too big, you’ll face several issues:
- Less airflow means less comfort
- Higher energy bills
- Uneven temperatures
- System strain
“Precision in ductwork sizing is not just a recommendation—it’s a necessity for optimal HVAC performance.”
Improper Sealing Techniques
Sealing your return ducts right stops air leaks and keeps your system working well. But, people often make mistakes like:
- Using bad tape instead of the right stuff
- Not cleaning surfaces before sealing
- Not sealing all the joints
- Not checking the seals after you’re done
Pro tip: Always use professional-grade sealing materials and take your time to ensure thorough coverage.
By avoiding these common mistakes, you’ll get a better hvac return duct installation. It will make your home more comfortable.
Maintaining Your New Return System
Keeping your hvac renovation in top shape is key. Regular care makes sure your return system works well. This protects your home’s air and your HVAC’s life.
Your return system needs regular checks to avoid problems. Create a maintenance plan with important tasks:
- Clean return air grilles monthly with a soft brush or vacuum
- Change air filters every 90 days, or sooner if it’s dusty
- Look for duct leaks or damage once a year
- Check if return air vents are sealed well
Dust and debris can really hurt your HVAC’s performance. They block airflow, making your system work harder and costing more to run.
Getting a pro to check your system is vital. Have a HVAC expert inspect it every 1-2 years. They can spot issues you might miss.
Proactive maintenance prevents costly repairs and extends your HVAC system’s operational life.
Watch for signs like strange noises, less airflow, or more dust. These could mean your return system needs help right away.
Explore Our HVAC Shop
Looking for top-rated HVAC tools, parts, and accessories? Visit our shop and find the perfect solution for your needs.
Visit the ShopProfessional vs. DIY Installation Considerations
Choosing between professional and DIY installation for your HVAC system is important. Your skills, time, and knowledge matter a lot. They help decide the best choice for you.
DIY installation of a return air system needs special skills and knowledge. Think about your comfort with big home improvement projects before starting.
- Technical skills required for DIY installation
- Understanding of ductwork and airflow dynamics
- Familiarity with local building codes
- Access to specialized tools
Professional HVAC technicians have skills DIY folks might not. They know how to make systems work best.
| DIY Installation | Professional Installation |
|---|---|
| Lower upfront costs | Guaranteed quality work |
| Personal satisfaction | Comprehensive system evaluation |
| Potential for mistakes | Warranty protection |
Your situation will guide your choice. Think about your skills, budget, and HVAC system’s future when deciding.
Proper installation is key to maintaining efficient and effective home heating and cooling systems.
Wrong installation can harm your system’s efficiency and cost more to run. It can also damage your HVAC equipment over time.
Conclusion
Adding a return to your HVAC system is a smart move. It boosts airflow and makes your home more comfortable. This upgrade can change your living space for the better.
Success in this project comes from careful planning and precise measurements. Knowing your home’s HVAC needs is key. Follow the steps in this guide to upgrade your system without big costs or renovations.
Safety and the right techniques are crucial. While some can do it themselves, getting help from a pro is wise. They ensure your system meets codes and works well.
Putting in the effort to add a return air system pays off. You’ll get better air quality, even temperatures, and maybe save on energy. Your home will be more comfortable and cost-effective.
FAQ
How do I know if my HVAC system needs an additional return?
Can I add a return vent myself, or should I hire a professional?
What tools will I need to add a return vent?
How much does it cost to add a return vent?
How do I know if my HVAC system needs an additional return?
Can I add a return vent myself, or should I hire a professional?
What tools will I need to add a return vent?
How much does it cost to add a return vent?
FAQ
How do I know if my HVAC system needs an additional return?
Look out for uneven room temperatures and high energy bills. Stuffy air and too much dust are also signs. If rooms feel pressurized or have bad airflow, you might need a new return.
Can I add a return vent myself, or should I hire a professional?
If you’re good with DIY projects, you can try it yourself. But, if you’re not sure about ductwork or electrical systems, get a pro. They make sure it’s done right and works well.
What tools will I need to add a return vent?
You’ll need a tape measure, utility knife, and drywall saw. Don’t forget a drill, level, and stud finder. Also, metal cutting tools, sheet metal snips, and sealants are important. Plus, safety glasses and gloves for protection.
How much does it cost to add a return vent?
Prices vary from 0 to
FAQ
How do I know if my HVAC system needs an additional return?
Look out for uneven room temperatures and high energy bills. Stuffy air and too much dust are also signs. If rooms feel pressurized or have bad airflow, you might need a new return.
Can I add a return vent myself, or should I hire a professional?
If you’re good with DIY projects, you can try it yourself. But, if you’re not sure about ductwork or electrical systems, get a pro. They make sure it’s done right and works well.
What tools will I need to add a return vent?
You’ll need a tape measure, utility knife, and drywall saw. Don’t forget a drill, level, and stud finder. Also, metal cutting tools, sheet metal snips, and sealants are important. Plus, safety glasses and gloves for protection.
How much does it cost to add a return vent?
Prices vary from $300 to $1,500. DIY is cheaper, but pros might cost more for complex jobs. Location, how easy it is to get to, and materials affect the price.
How long does it take to install a new return vent?
DIYers might take 4-8 hours. Pros can do it in 3-5 hours. More complex jobs could take a whole day or longer.
Where is the best location for a new return vent?
Choose central spots with good airflow. Avoid direct sunlight and heat sources. Hallways, large rooms, or central areas work best for easy duct connection.
Do I need permits to add a return vent?
It depends on your area. Most places need permits for HVAC changes, especially if it involves walls or electrical. Always check with your local building department first.
How often should I maintain my new return vent system?
Clean return vents every 3-6 months. Change air filters monthly. Get a professional HVAC check-up once a year. Regular care keeps your system running well.
Can adding a return vent improve my home’s energy efficiency?
Yes, it can. Properly installed return vents balance air pressure. This reduces strain on your system and keeps temperatures even throughout your home.
What are common mistakes to avoid during return vent installation?
Avoid wrong duct sizing, poor sealing, and bad insulation. Don’t place vents wrong or ignore local codes. Pay attention to details to avoid mistakes.
,500. DIY is cheaper, but pros might cost more for complex jobs. Location, how easy it is to get to, and materials affect the price.
How long does it take to install a new return vent?
DIYers might take 4-8 hours. Pros can do it in 3-5 hours. More complex jobs could take a whole day or longer.
Where is the best location for a new return vent?
Choose central spots with good airflow. Avoid direct sunlight and heat sources. Hallways, large rooms, or central areas work best for easy duct connection.
Do I need permits to add a return vent?
It depends on your area. Most places need permits for HVAC changes, especially if it involves walls or electrical. Always check with your local building department first.
How often should I maintain my new return vent system?
Clean return vents every 3-6 months. Change air filters monthly. Get a professional HVAC check-up once a year. Regular care keeps your system running well.
Can adding a return vent improve my home’s energy efficiency?
Yes, it can. Properly installed return vents balance air pressure. This reduces strain on your system and keeps temperatures even throughout your home.
What are common mistakes to avoid during return vent installation?
Avoid wrong duct sizing, poor sealing, and bad insulation. Don’t place vents wrong or ignore local codes. Pay attention to details to avoid mistakes.

