Affiliate Disclosure
HVAC Guide Guys is a participant in the Amazon Services LLC Associates Program, an affiliate advertising program designed to provide a means for sites to earn advertising fees by advertising and linking to Amazon.
Are you tired of uneven temperatures and high energy bills? These problems often come from poorly installed HVAC register boxes. Your home’s comfort and efficiency depend on precise installation techniques.

Register boxes connect ductwork to room vents. This guide will show you how to install them like a pro. You’ll learn how to pick the right register box, gather tools, and install it perfectly.
Whether you’re a DIY fan or just want to know more about your HVAC system, this guide is for you. It will give you the confidence to install register boxes yourself.
Key Takeaways
- Understand the critical role of register boxes in home comfort
- Learn professional installation techniques
- Identify required tools and safety equipment
- Prevent common installation mistakes
- Improve overall HVAC system efficiency
- Save money on professional installation costs
Table of Contents
Understanding HVAC Register Boxes and Their Role in Your Home’s Comfort
Your home’s heating and cooling system is like a complex network of air highways. Register boxes are key points where air flows into each room. They play a vital role in making your home comfortable.
What Is an HVAC Register Box and Why It Matters
Register boxes link branch ducts to room vents, part of the supply air system. They’re the “leaves” where comfort reaches you in the ductwork analogy. These components are essential for several reasons:
- Create a secure mounting point for register covers
- Ensure an airtight seal between ducts and living spaces
- Direct airflow into rooms at the optimal angle
The Connection Between Register Boxes and Air Distribution
Think of register boxes as the final checkpoint in your home’s air delivery system. They ensure conditioned air reaches each room correctly. This prevents uncomfortable temperature variations by balancing air distribution.
How Register Boxes Impact Energy Efficiency and Comfort
Properly installed register boxes stop air leaks that can waste up to 30% of conditioned air. The supply air exits through registers, while return grilles bring air back, creating a loop. Air pressure in your home depends on sealed and correctly positioned register boxes.
- Correct installation can improve HVAC efficiency by 15-30%
- Prevents air from escaping into wall cavities
- Reduces energy waste and utility costs
Understanding the role of register boxes ensures your home is both comfortable and energy-efficient.
Explore Our HVAC Shop
Looking for top-rated HVAC tools, parts, and accessories? Visit our shop and find the perfect solution for your needs.
Visit the ShopTypes of HVAC Register Boxes: Choosing the Right One for Your Installation
Choosing the right register box for your HVAC system is key for the best performance. There are many types of register boxes, each made for different needs.
Your main choices are:
- Floor Register Boxes: Designed for downward airflow through flooring
- Wall Register Boxes: Mounted vertically in wall cavities
- Ceiling Register Boxes: Installed for overhead air distribution
The material of the register box is also important. Here’s a quick look at the common materials:
| Material | Pros | Best Used For |
|---|---|---|
| Galvanized Steel | Durable, fire-resistant | High-traffic areas, commercial spaces |
| Plastic | Lightweight, easy to install | Residential applications, budget-friendly projects |
| Insulated | Prevents condensation | Humid environments, temperature-sensitive areas |
When buying a register box, check the connection types. Make sure it fits your ductwork. Some boxes need extra round collars or adjustable connections for different duct sizes and angles.
Pro tip: Measure your ductwork well before picking a register box. The box must fit your duct size and the register cover you want. Look for special options like adjustable-angle boots or multi-directional boots for tricky installations.
Essential Tools and Materials for Installing an HVAC Register Box
Getting ready for an HVAC register box installation needs careful planning and the right tools. Choosing the right tools and materials is key for a professional job. Having everything ready will make the installation smooth and easy.
Safety First: Protecting Yourself During Installation
When working with HVAC parts, safety is most important. Use these safety items to protect yourself:
- Leather gloves (sheet metal can be as sharp as a razor blade)
- Safety glasses to shield your eyes
- Dust mask for respiratory protection
Critical Tools for Precise Cutting and Fastening
Here are the tools you need for a successful installation:
- Flashlight for illuminating tight spaces
- Measuring tape for accurate dimensions
- Straight edge for clean, precise cuts
- Sharpie marker for marking measurements
- Utility knife for initial cuts
- Sheetrock saw for wall openings
- Hand saw or circular saw for lumber
- Power drill for secure fastening
- Tin snips for metal cutting
- Ladder for reaching high installations
- 4-in-1 screwdriver for versatile work
- Razor knife for detailed trimming
Materials Checklist for Professional Installation
Here’s what you need for a complete installation:
- Register box
- Circular flexible ducting
- Circular collars for connections
- 2×4 lumber for framing
- Screws for secure attachment
- Aluminum HVAC tape (not standard duct tape)
- Register cover
- Insulation (if needed)
Pro tip: Always double-check your tools and materials before starting the installation to avoid interruptions and ensure a seamless process.
Explore Our HVAC Shop
Looking for top-rated HVAC tools, parts, and accessories? Visit our shop and find the perfect solution for your needs.
Visit the ShopPre-Installation Planning: Measuring, Locating, and Preparing Your Workspace
Starting an HVAC register box installation right is key. Experts say good planning makes all the difference. It turns a tough job into a breeze.

First, make a detailed scaled drawing of your space. This step lets you see the whole process before you start.
Locating Joists and Planning Register Placement
When picking where to put your register box, think about a few important things:
- Put supply registers on outside walls or under windows
- Don’t block airflow with furniture
- Keep 10-15 feet between registers in big rooms
- Think about your room’s layout and furniture
Here’s what you should do next:
- Mark where each register will go
- Find and mark where return air will go
- Locate and mark joist positions for ducts
- Figure out duct lengths
- Make a list of all materials you’ll need
- Look for any obstacles
Measuring for the Perfect Fit Between Joists
Getting your measurements right is essential. Here’s how to do it:
- Find the middle between two joists
- Measure the space between joist edges
- Check if it fits with your register box
- Mark the cutout carefully
“A good plan is 80% of a successful installation.”
Tip: Make your cutout about ¼ inch bigger than the register box. This makes it easier to install and adjust. It also makes sure the cover fits well on all sides.
How to Install HVAC Register Box: Complete Step-by-Step Process
Installing an HVAC register box needs careful planning and precise steps. Your success depends on a systematic approach for proper airflow and energy efficiency. Before starting, gather all necessary materials and tools for a smooth HVAC register installation.
The installation process involves several critical steps. Start by accessing your attic or crawl space with a flashlight to locate existing ducts. Careful preparation is key to a successful installation.
- Locate existing ductwork using proper lighting
- Measure the space for the register box
- Clear the workspace of insulation and obstacles
- Gather necessary materials like flexible ducting and register cover
Next, you’ll focus on creating the opening. Precision is key when marking and cutting. Use your measuring tools to find the exact location, avoiding structural elements like joists or electrical wiring. When cutting the opening, move slowly and carefully to maintain clean edges.
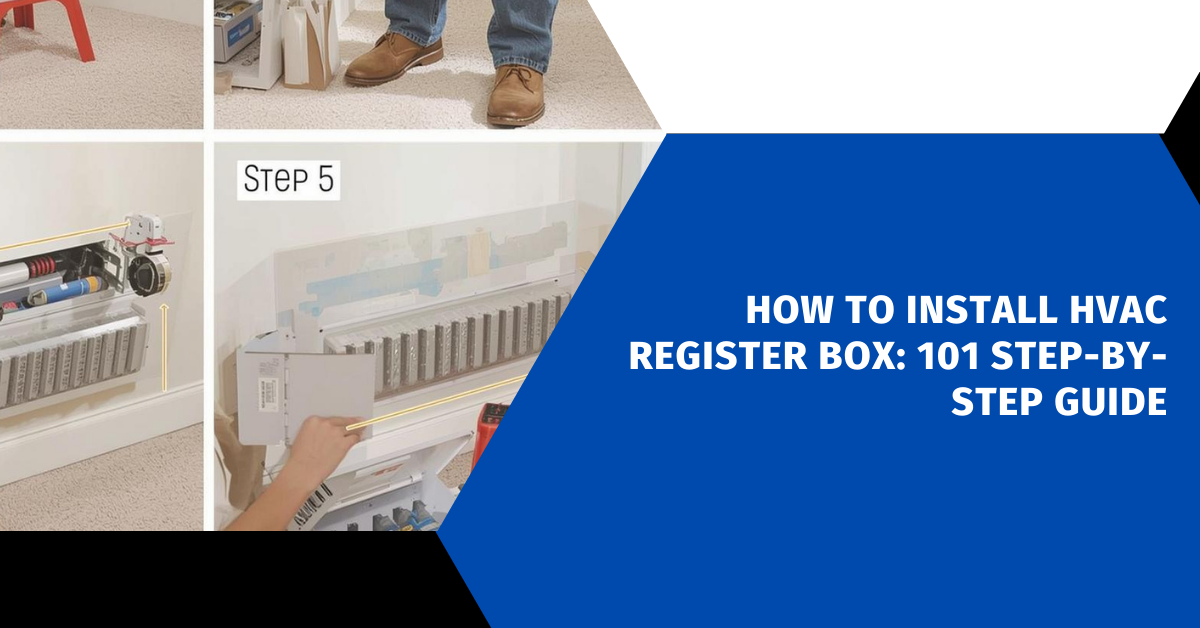
Framing the opening requires installing support lumber around the cut area. This step provides a solid mounting surface for your register box. Attach the box securely, making sure it sits flush with your finished surface.
Connecting ductwork is a critical phase of the installation. You’ll need to extend flexible ducting from existing runs to your new register box. Seal all connections using high-quality HVAC tape to prevent air leaks and maintain system efficiency.
The final steps involve securing the register cover and testing the installation. Run your HVAC system to check airflow and listen for any unusual noises that might indicate improper installation.
Explore Our HVAC Shop
Looking for top-rated HVAC tools, parts, and accessories? Visit our shop and find the perfect solution for your needs.
Visit the ShopCutting the Opening: Floor, Wall, and Ceiling Installation Techniques
Installing an HVAC register box needs precision and careful prep. Success comes from making clean cuts and solid support for the register box. This guide will show you how to cut and frame for different surfaces.
Creating Clean Cuts in Drywall and Flooring
When cutting for your HVAC register box, detail matters. Precision is key to a professional installation. Begin by scoring lines on the drywall with a utility knife. Make several passes to cut through the paper and into the gypsum core.
- Score lines carefully with a utility knife
- Cut the hole in the drywall with a sheet rock saw
- Cut holes ¼” oversized for easier register placement

- Hardwood floors: Use a circular saw set to flooring thickness
- Carpet installations: Carefully cut and peel back carpet and padding
- Tile floors: Score tiles with a tile cutter before removing
Framing the Opening with Support Lumber
Proper framing keeps your register box stable and secure. Cut two 2×4 pieces to fit between the joists. Then, in the attic, place the 2x4s around your hole to create a frame. Use your power drill to screw the 2x4s to the joists.
Pro Tip: Always measure twice and cut once to avoid unnecessary mistakes.
Make sure your frame is strong to support the register box. This careful prep will give you a professional-looking install. It will also boost your home’s HVAC system efficiency.
Connecting the Register Box to Existing Ductwork
Connecting your new register box to existing ductwork needs precision and skill. First, you must find the right way to connect it to your HVAC system.
For flexible duct connections, follow these steps:
- Cut a circular hole in the existing return duct using a power drill and tin snips
- Fit the circular collar into the new hole in the existing duct
- Extend the flexible ducting between the return box and new hole
- Connect the flexible ducting securely
When you connect the ductwork, focus on mechanical fastening. Use three screws per joint for mechanical strength. Also, secure flexible ducts with approved zip ties before sealing. This ensures no air leaks and keeps your HVAC system running well.
Your connection method should include:
- Measuring the exact duct length needed
- Cutting flexible duct smoothly
- Sliding inner liner over the collar
- Securing connections with zip ties
- Sealing all seams with HVAC tape
Professional installers know that every connection point is key. Spending extra time to fasten and seal joints helps avoid efficiency losses. It also makes sure your HVAC system works at its best.
Sealing and Insulating Your Register Box Installation
Sealing and insulating your HVAC system is key to efficiency. When installing a register box, focus on two main things. These are preventing air leaks and improving thermal performance. These steps might seem small but they greatly affect your home’s comfort and energy use.
Mastering Sealing Techniques to Prevent Air Leaks
Air leaks can lower your energy efficiency and raise utility bills. Use UL-181 rated mastic sealant or metal-backed tape for the best seal. Here are important sealing tips:
- Apply three screws per joint for mechanical strength
- Seal all joints, seams, and connections carefully
- Pay special attention to areas where different materials meet
- Never use standard cloth duct tape, which deteriorates quickly
Insulation Requirements for Maximum Efficiency
Insulation is vital for your HVAC system’s performance. Follow these essential guidelines:
- In unconditioned spaces, use minimum R-8 insulation
- In semi-conditioned spaces, use at least R-6 insulation
- Ensure insulation covers all metal surfaces
- Seal all insulation seams with appropriate tape
- Keep insulation dry during and after installation
“Proper insulation can reduce energy loss by up to 40% in unconditioned spaces.”
Supporting ducts every 4 feet is also key. Avoid compressing insulation with supports. By following these detailed sealing and insulation techniques, you’ll get a more efficient, lasting HVAC register box installation. This will save energy and boost your home’s comfort.
Explore Our HVAC Shop
Looking for top-rated HVAC tools, parts, and accessories? Visit our shop and find the perfect solution for your needs.
Visit the ShopInstalling the Register Cover and Final Adjustments
The last step in installing your HVAC register box is putting the register grill over the ceiling hole. This ensures good airflow and a neat finish to your project.
- Double-check the size with your register cover
- Leave enough space to screw it into place on the edges of the hole
- Ensure the cover is slightly larger than the rough opening
Choosing the right register cover is key. Think about these when picking:
- Material durability – Steel, plastic, or wood options
- Finish that matches your home’s décor
- Proper sizing for optimal airflow
When installing your register cover, follow these steps:
- Clean the opening thoroughly
- Test-fit the cover to ensure it sits flush
- Secure with appropriate screws
- Check that the damper moves smoothly
Pro tip: Run the HVAC system and check for even airflow. Adjust damper settings if needed to balance air distribution in your home.
Common Mistakes to Avoid When Installing HVAC Register Boxes
Installing HVAC register boxes might seem easy, but many mistakes can hurt your system’s performance. Knowing these common errors helps you install like a pro. This way, you get better comfort and save on energy.
Professional HVAC installers know that small mistakes can cause big problems. To succeed, you must avoid these key errors:
- Kinked or Compressed Flex Ducts that reduce airflow by up to 60%
- Sharp 90-Degree Turns creating turbulence and restricting airflow
- Undersized ducts forcing your system to work harder
- Poorly sealed connections wasting energy
Sizing Errors That Impact Performance
Getting the size wrong can really hurt your HVAC system’s efficiency. A register box that’s too small blocks airflow, while one that’s too big doesn’t distribute air well. Here’s what to do:
- Always use Manual D calculations for precise sizing
- Measure dimensions carefully before purchasing
- Ensure register box matches ductwork capacity
- Consider room-specific heating and cooling needs
Connection and Sealing Problems
Sealing issues are another big challenge. Air leaks can waste 20-40% of your conditioned air, raising energy costs a lot. Use UL-181 rated foil tape or mastic sealant, and make sure all connections are tight. Seal every joint carefully.
By avoiding these common mistakes, you’ll make your HVAC system more efficient, quieter, and more comfortable. It will work well for many years.
Conclusion
Installing an HVAC register box is a rewarding DIY project. It can make your home more comfortable and energy-efficient. You now know how to install a professional-quality air distribution system.
Choosing the right register box is key to good performance. This choice depends on your specific needs.
Success comes from careful planning and precise work. You need to gather tools and materials and measure your space carefully. Each step is important for a good air distribution point.
Following the installation steps helps you avoid mistakes. These mistakes can hurt your system’s performance.
Sealing and insulation are vital for a quality installation. They prevent energy waste and keep your HVAC system efficient. This project needs patience and detail, but it’s worth it.
It leads to balanced airflow, consistent temperatures, and lower energy costs. If you face challenges, like complex ductwork, get help from a licensed HVAC professional.
Your register box installation is an investment in your home’s comfort and efficiency. Be proud of your work. Take your time and enjoy the better climate control in your home.