Affiliate Disclosure
HVAC Guide Guys is a participant in the Amazon Services LLC Associates Program, an affiliate advertising program designed to provide a means for sites to earn advertising fees by advertising and linking to Amazon.
Ever wondered what makes HVAC pros different from beginners? It’s knowing how to install a vacuum gauge. This skill is key to your system’s success.

A vacuum gauge is a must-have for HVAC experts. It shows the pressure difference between outside air and your system’s pressure. This info is vital for checking system health and getting ready for refrigerant.
Learning to connect a vacuum gauge is more than a skill. It’s your way to keep your system running smoothly and avoid expensive fixes. This guide will show you how to install a vacuum gauge for HVAC. You’ll learn to diagnose and care for HVAC systems like a pro.
Key Takeaways
- Vacuum gauges are critical for diagnosing HVAC system performance
- Proper installation requires precision and understanding
- Measuring system pressure helps prevent equipment failures
- Digital and analog vacuum gauges offer different advantages
- Professional technicians rely on accurate vacuum measurements
Table of Contents
Understanding the Importance of Vacuum Gauges in HVAC Systems
Vacuum gauges are key tools for checking your HVAC system’s health. They help professionals keep systems running well and lasting longer. This is done by accurately measuring the refrigeration system’s vacuum.
Modern HVAC systems are complex. Knowing how to read vacuum pressure is vital. It can mean the difference between a job well done and a system failure.
Why HVAC Technicians Need Vacuum Gauges
Vacuum gauges give insights that other tools can’t. They help you:
- Spot moisture and contaminants
- Check if the system is fully evacuated
- Stop refrigerant system damage
- Use the right hvac evacuation methods
The Role of Micron Measurement in System Performance
Micron measurements are key to knowing if a system is ready. A vacuum below 500 microns shows:
| Micron Level | System Condition |
|---|---|
| 500-1000 microns | Good for refrigerant charge |
| Below 500 microns | Best system performance |
| Above 1000 microns | System might be contaminated |
Professional tip: Always use a calibrated vacuum gauge for accurate readings. This protects your HVAC system’s health.
Essential Tools and Equipment for Vacuum Gauge Installation
Choosing the right tools is key for your HVAC system’s success. Your vacuum gauge setup needs specific parts for accurate readings and efficient system evacuation.
- Digital or analog vacuum gauges
- Vacuum-rated hoses with appropriate diameter
- Valve core removal tools
- Ball valves for pump isolation
- Specialized hose fittings and adapters
There are two main types of vacuum gauges: analog and digital. Analog gauges have a traditional needle. Digital gauges show numbers and have extra features like logging data.
Vacuum-rated hoses are vital for your setup. They have bigger diameters than regular hoses. This helps your system evacuate faster.
Professional HVAC techs know the value of color-coded hoses:
- Blue hoses: Low-pressure (suction) side
- Red hoses: High-pressure (discharge) side
- Yellow hoses: Utility port connections
Quality tools make your HVAC work easier and more precise. They ensure your system evacuates well.
Explore Our HVAC Shop
Looking for top-rated HVAC tools, parts, and accessories? Visit our shop and find the perfect solution for your needs.
Visit the ShopWhy Pulling a Deep Vacuum is Critical for HVAC Systems
Understanding the refrigerant line evacuation process is key when installing or repairing an HVAC system. The deep vacuum technique is a vital step. It greatly affects your system’s longevity and efficiency.
The main goal of thorough hvac evacuation techniques is to remove contaminants. These can harm your system’s performance. They include:
- Moisture
- Non-condensable gases
- Air particles
- Residual refrigerants
Removing Moisture and Non-Condensable Gases
Moisture in your HVAC system can cause serious damage. It turns into acid and can freeze at key points. Non-condensable gases also affect pressure readings and efficiency.
| Pressure Level | Water Boiling Point | System Impact |
|---|---|---|
| 1,000 microns | 1°F | Limited moisture removal |
| 500 microns | -12°F | Effective moisture elimination |
The 500 Micron Standard Explained
The 500 micron standard is a key benchmark for vacuum depth. At this level, water boils at -12°F, ensuring all moisture is vaporized. Always check your manufacturer’s guidelines for the exact vacuum needed.
Using these hvac evacuation techniques helps protect your system. It ensures your system works at its best for a long time.
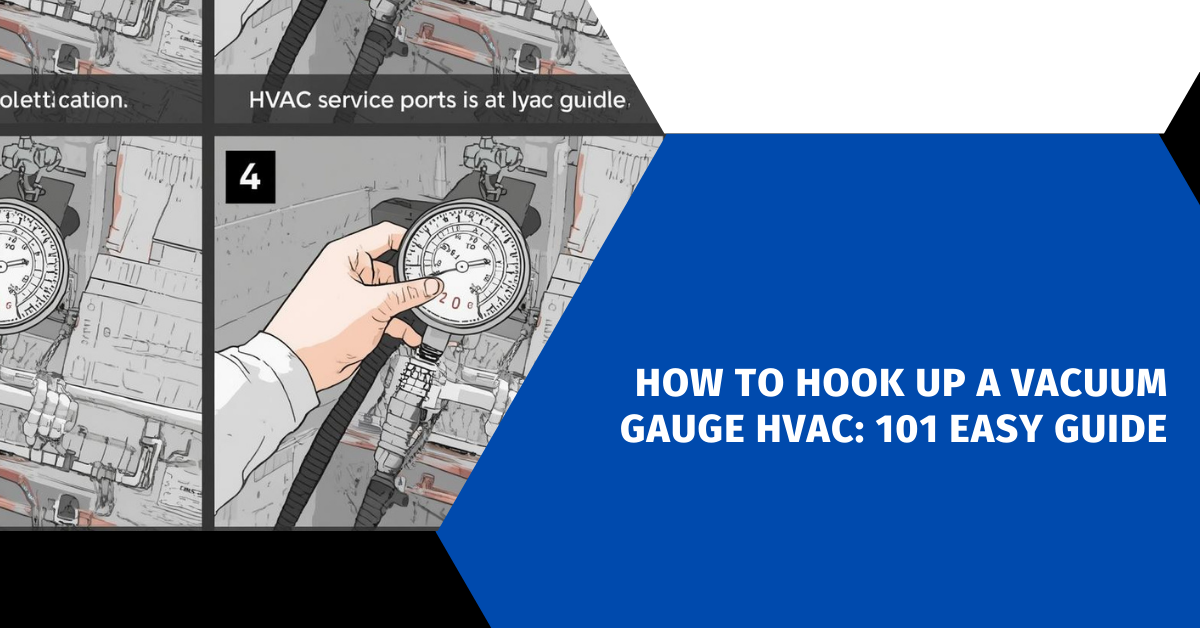
How to Hook Up a Vacuum Gauge HVAC
Connecting a vacuum gauge to an HVAC system needs care and attention. The steps to hook up a vacuum gauge HVAC are key for system evacuation and performance.
To start the micron gauge connection, follow a strategic plan:
- Find the service ports on your HVAC system
- Get ready your vacuum-rated hoses and connections
- Remove valve cores with a core removal tool
- Choose the best spot for your vacuum gauge
When connecting the vacuum gauge to the HVAC system, placement is key. Always put the gauge as far back as you can. This way, you measure the vacuum level at the hardest point to evacuate.
Important connection tips are:
- Use red ports and hoses for high-pressure connections
- Connect blue ports and hoses for low-pressure side
- Make sure all connections are tight and leak-free
- Check gauge calibration before starting evacuation
Pro tip: A tee fitting can help you connect both the manifold hose and micron gauge to the same service port if needed.
By following these steps, you’ll set up a reliable vacuum gauge. It will give you accurate system performance measurements.
Choosing the Right Vacuum Gauge Placement on Your System
Getting your vacuum gauge right is key for checking your HVAC system. Where you put your vacuum gauge can affect your system check. Knowing how to install your hvac vacuum gauge correctly helps you get accurate readings and avoid big mistakes.
- Put the vacuum gauge as far from the vacuum pump as possible
- Connect it directly to the system’s service port
- Stay away from manifold connections
- Make sure the gauge is isolated for accurate readings
Optimal Distance from the Vacuum Pump
Setting up your vacuum gauge right means understanding how your system works. Your vacuum pump might quickly reach 20-50 microns, but parts of the system can slow it down. Place your gauge near the evaporator coil, the system’s farthest point, for the most accurate vacuum levels.
Avoiding Common Placement Mistakes
Technicians often make big mistakes when installing hvac vacuum gauges. Putting gauges too close to the pump can give wrong readings. Always remember to:
- Don’t just rely on manifold compound gauges
- Use a dedicated micron gauge for exact measurements
- Check readings at the system’s farthest point
Your aim is to make sure the whole system hits the 500-micron mark, not just the pump area.
Explore Our HVAC Shop
Looking for top-rated HVAC tools, parts, and accessories? Visit our shop and find the perfect solution for your needs.
Visit the ShopConnecting Vacuum-Rated Hoses and Removing Valve Cores

When you’re about to connect a vacuum gauge to your HVAC system, picking the right hoses is key. Vacuum-rated hoses are the best choice for a micron gauge connection. They have wider diameters, which makes evacuating the system much faster.
Here are some important things to think about when connecting a vacuum gauge to your HVAC system:
- Choose vacuum-rated hoses with larger internal diameters (3/8″ or wider)
- Use the shortest hose length to avoid restrictions
- Make sure the hose’s pressure rating is correct before you install it
- Check the hose connections for any leaks
Removing valve cores is also a big step in getting your system ready. These small parts can slow down the evacuation process a lot. Use a special tool to carefully take out the cores from the service ports.
Here’s how to connect your hoses properly:
- Start by hand-tightening the connections
- Then, use the right wrench for the final tightening
- Make sure the connections are tight and leak-free
- Keep the removed valve cores in a safe place
Pro tip: Always equalize pressure before removing valve cores to prevent system damage.
By following these steps, you’ll make sure your vacuum gauge connection works well. This will help your HVAC system evacuate quickly and efficiently.
Reading and Interpreting Vacuum Gauge Measurements
Understanding vacuum gauge readings is all about detail and precision. HVAC technicians need to be experts at reading these gauges. They must watch for small changes in system pressure.
Vacuum gauge readings can be tricky. They require a deep understanding of the subject. Even tiny changes can affect the pressure.
Understanding Normal Pressure Fluctuations
When using HVAC evacuation techniques, you’ll see natural pressure changes. These changes are normal and shouldn’t worry you. Several things can affect these changes, including:
- Temperature variations
- Outgassing from system materials
- Minor equipment movements
- System equalization processes
Analog versus Digital Vacuum Gauge Readings
Technicians have two main choices for vacuum gauge readings:
| Analog Gauges | Digital Gauges |
|---|---|
| Needle-based readings | Numerical digital display |
| More prone to interpretation errors | Higher precision measurements |
| Lower initial cost | Advanced tracking features |
Pro tip: Wait five minutes after reaching 500 microns. This lets the system stabilize before checking the pressure.
Troubleshooting Common Vacuum Gauge Reading Issues
When you’re working on hvac evacuation, you might run into problems with vacuum gauge readings. These issues can confuse even the most skilled technicians. It’s important to know about these common problems to set up your vacuum gauge right and keep your system running well.
Ball-valve pressure spikes are a common trouble spot during vacuum tests. These quick pressure jumps happen when gas trapped in the valve is released. Don’t panic if you see a quick spike! Here are some key signs to look out for:
- Pressure spike lasting less than 60 seconds
- Rapid return to previous micron levels
- Spike between 10-50 microns
Outgassing is another issue that can mess with your readings. It happens when parts of the system release gases they’ve absorbed during evacuation. Look out for these signs:
- Gradual micron level rise
- Eventual stabilization below 1000 microns
- Bubbles appearing in manifold sight glass
To avoid problems with your hvac evacuation, follow these expert tips:
- Periodically open and close ball valves
- Check all hose connections for tightness
- Verify vacuum pump is functioning correctly
- Clean manifolds with rubbing alcohol if persistent bubbles appear
Digital vacuum gauges can sometimes show weird readings because of electronic interference. Always check your connections and think about recalibrating if the readings seem off.
Explore Our HVAC Shop
Looking for top-rated HVAC tools, parts, and accessories? Visit our shop and find the perfect solution for your needs.
Visit the ShopPerforming the Standing Vacuum Test
The standing vacuum test is a key step in connecting a vacuum gauge to an HVAC system. It checks if your refrigeration system is working right and if it’s fully evacuated.

First, pull your system down to 500 microns. Then, do a careful check to see if your system is leak-free and ready for refrigerant.
Isolating the System from the Vacuum Pump
To do the standing vacuum test right, follow these steps:
- Close the valve on the system side of the service ports
- Turn off the vacuum pump completely
- Connect your vacuum gauge directly to the system
- Watch the micron readings closely
Identifying Leaks versus Outgassing
It’s important to understand what the vacuum gauge readings mean:
- Rapid Pressure Increase: Shows a big leak
- Slow Pressure Rise (below 1000 microns): Normal outgassing
- Pressure Rise Above 1000 microns: Means there’s residual moisture
A good standing vacuum test shows less than 100 microns of pressure increase in 10-15 minutes. This means your HVAC system is evacuated well and ready for the next steps.
Triple Evacuation Method for Excess Moisture Removal
When standard methods don’t work, the triple evacuation method is key for HVAC techs. It’s used to remove stubborn moisture that usual methods can’t handle.
This method uses vacuum pulling and nitrogen flushing to get rid of moisture in your HVAC system. It’s needed when:
- Evacuation takes longer than 45-60 minutes
- Standing vacuum tests show micron levels above 1000
- Systems have been exposed to open atmosphere for extended periods
- Recovering from system contamination events
Here’s how the triple evacuation process works:
- First Evacuation: Pull system down to 1,000-2,000 microns
- Break vacuum with dry nitrogen at 3-5 PSIG
- Second Evacuation: Pull down to 500 microns
- Repeat nitrogen flush
- Third Evacuation: Pull down to 300 microns
- Perform final standing vacuum test
Using nitrogen between evacuations helps draw out moisture. This method might take 2-3 hours. It prevents long-term damage from moisture in your HVAC system.
Pro Tip: Always use clean, dry nitrogen and maintain proper pressure to avoid system damage.
Best Practices for HVAC Vacuum Pump Usage and Maintenance
Keeping your HVAC vacuum pump in top shape is key for the best system performance. It also helps your equipment last longer. Experts know that using your vacuum pump right is more than just turning it on. It’s about regular upkeep and careful use.
- Change pump oil after every 8-10 hours of use
- Inspect oil color and consistency regularly
- Check connection seals before each evacuation
- Operate with gas ballast open during initial moisture removal
Preventing Ball-Valve Pressure Spikes
Ball valves can sometimes cause sudden pressure changes. Here’s how to avoid these issues:
- Periodically cycle ball valves every 10-15 minutes
- Release trapped gas incrementally
- Use quarter-turn valves with minimal dead volume
- Check valve sealing mechanisms before operation
Maintaining Proper Hose Connections
Your vacuum gauge setup relies on careful hose connections. Make sure to check:
- Worn gaskets
- Potential thread damage
- Secure fitting alignment
- Potential microscopic leaks
By sticking to these expert maintenance tips, you’ll make your HVAC system work better. And you’ll get accurate vacuum readings every time.
Conclusion
Installing an hvac vacuum gauge is not just a technical task. It’s the foundation of top-notch HVAC service. Knowing how to connect a vacuum gauge to hvac systems keeps your equipment running well for longer. Every step, from where you place it to how you evacuate, is key to great system care.
Your focus on accuracy is vital. Getting rid of moisture and gases that can’t be condensed is essential for system efficiency. Digital manifolds with vacuum gauges can make your job easier. But, the basic steps are the same. Always connect your gauge right to the system, use hoses rated for vacuum, and follow best practices closely.
Being good with vacuum gauges makes you stand out as an HVAC expert. The 500 micron standard is more than a number; it’s the mark for removing moisture effectively. By learning the right evacuation methods, you avoid system failures and cut down on service calls later on.
Keeping up with new knowledge is important in this changing field. Stay current with what manufacturers say, try out new tech, and focus on every detail in your work. Your skill and professionalism lead to happy customers and their comfort.