Can You Replace HVAC Yourself? As summer heats up, your home’s air conditioning is a cool haven. But what if it stops working? The idea of replacing it yourself might seem scary. Yet, saving money and feeling proud of your work can be very rewarding.
Before you start, it’s important to know the challenges and dangers of DIY HVAC installation. It’s not just about saving money. It’s about doing it right and safely.
Affiliate Disclosure
HVAC Guide Guys is a participant in the Amazon Services LLC Associates Program, an affiliate advertising program designed to provide a means for sites to earn advertising fees by advertising and linking to Amazon.

Key Takeaways
- HVAC replacement is a complex task that requires careful planning and understanding of the system.
- DIY installation can save costs but poses significant safety concerns and risks.
- Proper installation is crucial for system performance and energy efficiency.
- The process involves removing old ductwork, installing new components, and ensuring all connections are secure and sealed.
- Professional installers bring expertise and efficiency, providing peace of mind during the replacement process.
Table of Contents
Understanding HVAC Systems and DIY Replacement Feasibility
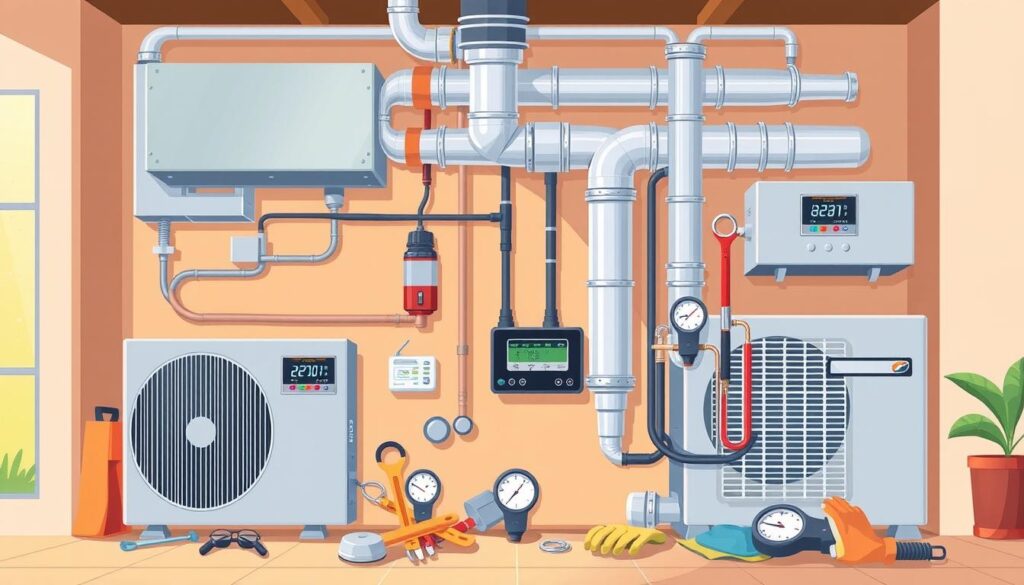
Keeping your home comfortable is key, and your HVAC system is essential for this. It has many HVAC components that control temperature, humidity, and air quality. Knowing your HVAC system’s parts can help you decide if you can replace it yourself.
Components of a Home HVAC System
A typical home HVAC system has a few main parts:
- Ductwork: This is the air duct network that spreads conditioned air around your home.
- Thermostat: It lets you set and check the temperature you want.
- Evaporator Coil: This part takes heat from the air inside your home.
- Condenser Unit: Outside, it releases the heat the evaporator coil absorbs.
- Compressor: It compresses the refrigerant, making the heat transfer work.
Skills Required for DIY Installation
Doing your own HVAC replacement needs certain DIY HVAC skills. You’ll need to know about electrical work, handling ductwork, and setting up the system. If you don’t do it right, it could be dangerous, less efficient, and even damage the system. Think carefully about your skills and the risks before starting a DIY HVAC project.
Cost Comparison: DIY vs Professional Installation
Doing it yourself might save money at first, but think about the long-term costs and risks. Professional installation usually comes with warranties and follows local rules, giving you peace of mind and avoiding expensive problems later. The HVAC installation costs for DIY might be lower, but the chance of doing it wrong and needing repairs later might cost more than the initial savings.
“Replacing your HVAC system is a big deal, and making the right choice is important. It’s about balancing cost, safety, and long-term efficiency.”
Explore Our HVAC Shop
Looking for top-rated HVAC tools, parts, and accessories? Visit our shop and find the perfect solution for your needs.
Visit the ShopSafety Considerations Before Starting Your HVAC Project
When you start a DIY HVAC project, safety is key. Not following safety rules can lead to big risks. These include HVAC safety hazards, electrical safety problems, and DIY HVAC risks. Before starting, make sure you know and follow these important safety steps.
First, turn off power to both indoor and outdoor HVAC units. Working on live electrical systems can cause serious harm or even death. Also, be careful with sharp metal parts and wear gloves for protection.
If your project involves refrigerants or high-voltage wiring, you need the right training and certifications. Trying to do these tasks without the right skills is very dangerous. It can also break laws in your area.
It’s also important to follow building, mechanical, and electrical codes. Learn about the rules in your area. This ensures your project is safe and meets standards for inspections.
Always wear the right personal protective equipment (PPE). This includes gloves, goggles, and masks. It helps protect you from harmful materials, debris, and fumes.
Finally, keep your work area clean and well-ventilated. Good air quality is key. It helps avoid breathing in dust, debris, or fumes while you work.
By focusing on safety and following best practices, you can lower risks in DIY HVAC projects. This way, you can finish your home improvement safely and successfully.
Explore Our HVAC Shop
Looking for top-rated HVAC tools, parts, and accessories? Visit our shop and find the perfect solution for your needs.
Visit the ShopEssential Tools and Materials for HVAC Replacement
When you start an HVAC replacement project, getting ready is crucial. You’ll need the right HVAC installation tools, HVAC replacement materials, and HVAC safety equipment for a smooth DIY job. Here’s what you must have for your HVAC replacement journey.
Required Tools Checklist
- Pliers (both standard and needle-nose)
- Adjustable wrench
- Cross-tip screwdriver
- Drill with appropriate drill bits
- Stud finder
- Bi-metal hole saw
Materials and Parts Needed
The materials you need for your HVAC replacement depend on the system type. You might need:
- Ductwork (e.g., metal ducts, flexible ducts)
- Refrigerant lines
- Electrical wiring and connectors
- Coolant (e.g., R-410A refrigerant)
Safety Equipment Requirements
Keeping yourself safe is key during an HVAC replacement. Make sure you have:
- Gloves (heavy-duty work gloves)
- Safety goggles
- Respirator (for working with refrigerants)
Always put safety first in HVAC replacement projects. With the right HVAC installation tools, HVAC replacement materials, and HVAC safety equipment, you’re set for a successful DIY job.
Can You Replace HVAC Yourself: A Detailed Assessment
Replacing your HVAC system is a big job. It needs a good grasp of HVAC mechanics, electrical systems, and local codes. Doing it yourself can save money but takes a lot of time, often several days.
Before deciding to do it yourself, think about your skills, how much time you have, and your home’s HVAC setup. Making mistakes can cause your system to work poorly, increase energy costs, and be unsafe. For most people, hiring a pro is the best choice.
HVAC systems usually last 15 years before needing a new one. Getting a new, energy-saving unit can cut your energy bills by half. But, the cost of a new HVAC system varies a lot, from $2,500 to over $45,000, based on your home’s size and needs.
While DIY installation might seem cheaper, it’s risky. HVAC pros use special tools and follow detailed Manual J calculations to size your system right. They consider your home’s size, insulation, and windows.
Choosing between professional vs DIY HVAC depends on your skills, resources, and your home’s HVAC needs. DIY might work for some, but hiring a pro usually means better performance, energy savings, and safety.

Don’t forget, keeping your HVAC in good shape is key. Have it checked twice a year, before the hot and cold seasons, to keep it running well. Using a programmable or smart thermostat can also help save energy and cut waste.
Explore Our HVAC Shop
Looking for top-rated HVAC tools, parts, and accessories? Visit our shop and find the perfect solution for your needs.
Visit the ShopPreparing Your Home for HVAC Installation
Getting your home ready for a new HVAC system is key for a smooth installation. In Oak Ridge, TN, extreme weather can stress your home’s comfort systems. Here are seven important steps to prepare your home:
- Check the installation area, removing any obstacles like shrubs or trees.
- Turn off the gas and electricity to the old HVAC system for safety.
- Look over your ductwork for leaks or issues and fix them before the new system goes in.
- Go over the installation plan with your HVAC contractor to find the best spots for the units.
- Plan for any heating or cooling service disruptions during the install and make arrangements for pets.
- Make sure your electrical system can handle the new HVAC system. You might need to upgrade.
- Set up a clean, organized area for the HVAC team to store their tools and equipment.
By following these steps, you’ll help ensure a successful HVAC installation. Your help and cooperation are key to the project’s success.
Preparing your home for HVAC installation is crucial. These steps will help make the transition to your new system smooth. If you have any questions or concerns, talk to your HVAC contractor before the installation starts.
Step-by-Step Guide to Removing Old HVAC System
Replacing an old HVAC system is key to keeping your home comfortable and efficient. Before you can install a new one, you must remove the old one. This guide will help you through the HVAC removal process smoothly.
The first step is to disconnect the electrical connections. This means shutting off the power and removing all wiring. Then, a certified professional will remove any refrigerant, as this is a regulated and potentially hazardous process.
After dealing with the electrical and refrigerant parts, you can start disconnecting and removing the ductwork. You might need a reciprocating saw or other tools to detach the ductwork from the units. Make sure to dispose of any old, worn-out ductwork according to local regulations.
Finally, you can remove the indoor and outdoor units of the HVAC system replacement. You might need extra hands or specialized equipment, depending on the size and weight of the units. It’s important to dispose of the old HVAC system safely and responsibly, following local guidelines.
By following this guide, you can safely and successfully remove your old HVAC system. This makes way for your new, more efficient system.

Explore Our HVAC Shop
Looking for top-rated HVAC tools, parts, and accessories? Visit our shop and find the perfect solution for your needs.
Visit the ShopInstalling the New HVAC Unit: Technical Guidelines
Replacing your HVAC system needs careful attention to the technical details. From placing the outdoor unit to connecting the ductwork and making electrical connections, each step is crucial. It ensures the system works well and safely.
Proper Positioning and Leveling
Start by placing the outdoor HVAC unit in the right spot. Make sure it’s level and on a solid surface. This is key for the unit’s performance and life.
Use a level to check if the unit is balanced. If not, adjust the supports or the concrete pad.
Connecting Ductwork and Lines
Then, connect the ductwork to the new HVAC unit. Make sure it’s secure and airtight. For ductless mini-split systems, install the indoor unit where you want it.
Run the refrigerant line through the wall to connect it to the outdoor compressor. Seal all connections well to avoid leaks.
Electrical Connections
The last step is to connect the HVAC unit to your home’s power. This should be done by a qualified electrician. They ensure it meets local codes and safety standards.
Proper wiring and grounding are vital for safe and reliable operation. By following these steps, your new HVAC unit will be installed correctly. This will give you efficient and lasting comfort in your home. For complex tasks, always consult a professional HVAC technician for a successful installation.
Common Challenges and How to Overcome Them
DIY HVAC installation can come with some common hurdles. One big one is dealing with tight spaces, especially in older homes. Getting the new equipment and ductwork into these small areas can be hard. You’ll need the right tools and a careful eye to fit everything right.
Another challenge is finding asbestos in older HVAC systems. Homes built before the 1980s might have asbestos. It’s dangerous to mess with, so get a pro to check and remove it safely.
Getting the new HVAC system the right size is also key. A system that’s too small won’t cool or heat well, wasting energy. A system that’s too big can cause uneven heating and high bills. To avoid these HVAC installation problems, talk to an HVAC expert to find the perfect size for your home.
| Common DIY HVAC Troubleshooting Challenges | Solutions |
|---|---|
| Tight spaces in older homes | Use specialized tools and plan carefully for a proper fit |
| Presence of asbestos in older systems | Consult a professional for safe asbestos removal |
| Ensuring proper sizing of the new HVAC system | Seek guidance from an HVAC specialist to determine the right system size |
Knowing about these HVAC setup challenges and taking steps to avoid them can help you succeed. Always put safety first, and don’t hesitate to get help when you need it. This way, your DIY HVAC project can go smoothly and efficiently.
Testing and Troubleshooting Your New Installation
After installing your new HVAC system, it’s crucial to conduct thorough testing. This ensures everything is working correctly. You’ll need to do an initial system check and performance testing to find and fix any issues early.
Initial System Check
Start by checking the refrigerant charge to make sure it’s right. Then, test all electrical connections to see if they’re secure and working well. Lastly, check each part of the HVAC system to make sure they’re doing their job.
Performance Testing
Test your new HVAC system in different modes, like heating and cooling. Watch how temperature and airflow change in your home. HVAC performance check is key to spotting problems early and avoiding big issues later.
By doing detailed HVAC system testing, you can make sure your new system is running at its best. This way, you can catch any new HVAC troubleshooting needs before they become big problems. This approach will help your HVAC system last longer and work better.
“Regular maintenance can prevent major HVAC issues, ensuring efficient operation and avoiding unexpected breakdowns.”
Explore Our HVAC Shop
Looking for top-rated HVAC tools, parts, and accessories? Visit our shop and find the perfect solution for your needs.
Visit the ShopMaintenance Tips for Your New HVAC System
Keeping your HVAC system in top shape is key for its longevity and performance. As a homeowner, there are many DIY tasks you can do to keep it running smoothly. These include changing air filters and cleaning coils, which can greatly improve your system’s maintenance.
Changing or cleaning your air filters is a must. It helps cut down on dust and allergens in your home and boosts efficiency. Experts say to swap out disposable filters every 1-3 months or clean permanent ones monthly.
It’s also important to keep your vents and registers clean. Dust and debris can block airflow, lowering efficiency and shortening your air conditioner’s life. Cleaning the outdoor unit regularly also helps it work better and use less energy.
Don’t forget to inspect and clean the evaporator coil and drain line. Blockages in the drain line can harm indoor air quality, while dirty coils reduce efficiency. Also, fixing any leaks is vital for both air quality and energy use.
While DIY tasks are helpful, getting a professional to service your HVAC system yearly is a good idea. This annual check-up can spot problems early, ensure your system runs well, and extend its life.
| Maintenance Task | Frequency |
|---|---|
| Replace disposable air filters | Every 1-3 months |
| Clean permanent air filters | At least once a month |
| Clean vents and registers | Regular (monthly or bi-monthly) |
| Clean outdoor HVAC unit | Regular (monthly or bi-monthly) |
| Clean evaporator coil and drain line | Regular (every 6 months) |
| Professional HVAC system inspection | Annual |
By following these tips, you can keep your HVAC system running efficiently. This ensures a comfortable home and extends its life. Regular HVAC upkeep is essential for enjoying a well-functioning HVAC system for many years.
Conclusion
Choosing between DIY HVAC replacement and professional installation is a big decision. It involves looking at cost savings, time commitment, and risks. DIY can save money and time, but it’s risky. It can lead to injury, damage, and void warranties.
Professional installation, on the other hand, offers peace of mind. It ensures proper installation, warranties, and expertise. Working with a trusted HVAC service like Cates, with over 40 years of experience, is especially valuable. They ensure your system works well for years.
Deciding to DIY or hire a pro depends on your skills and the system’s complexity. Both options have risks and benefits. But, regular maintenance is key for your HVAC’s long-term performance and your home’s comfort.

